


KYC Portal
User Guide
Follow these instructions to register, complete the form, and properly manage the signing and submission of the due diligence documents.
Registration in the portal
- Click the link in the portal invitation email that says "Redeem Invitation".
- The invitation code will appear automatically. Click "Register".
- Create a username and password, store them in a safe place, and click "Log In".
Accessing the portal
- When entering the portal, complete your profile information. To do this, click on your name in the upper right corner, then select "Profile" and fill in the details.
- Click the orange button at the bottom of the page that says "Update".
Completing the form
- In the top menu, click "Due Diligence Form".
- In the action menu (the three dots next to your account name), click "Edit" to begin filling out the form.
- Carefully read each instruction within the form.
Required fields
- Most fields are only required when proceeding with the signature.
- Until you sign, you can fill in any fields you like and click "Save" to continue later.
- To check which fields are required before signing, select "Yet" for "Proceed to sign the document?" without clicking "Save". This will highlight all required fields.
Search fields
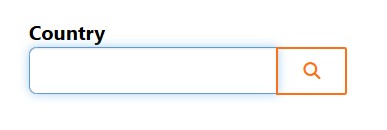
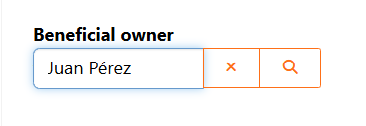
- You can create a new record or link an existing one.
- If the record already exists, click the magnifying glass button and select it.
- If you are creating a new record, click the magnifying glass button and select "New".
- To search for a word that is not the first in the name, place an asterisk (*) before it. For example, to search for "Bank of America" using "America," type "*America" in the search bar.
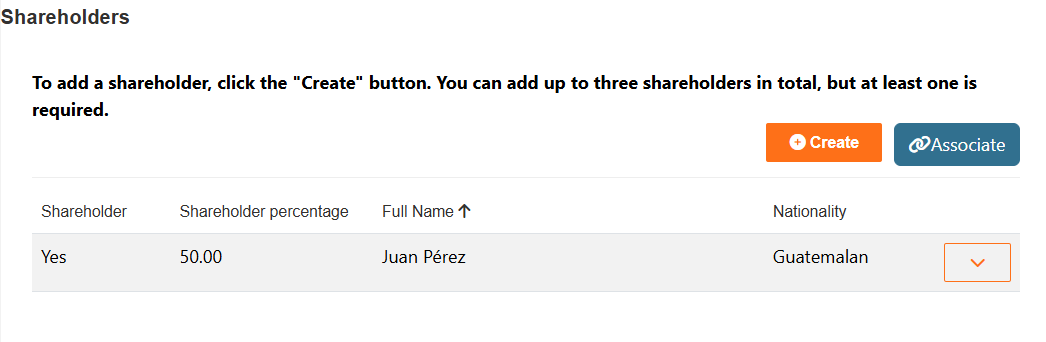
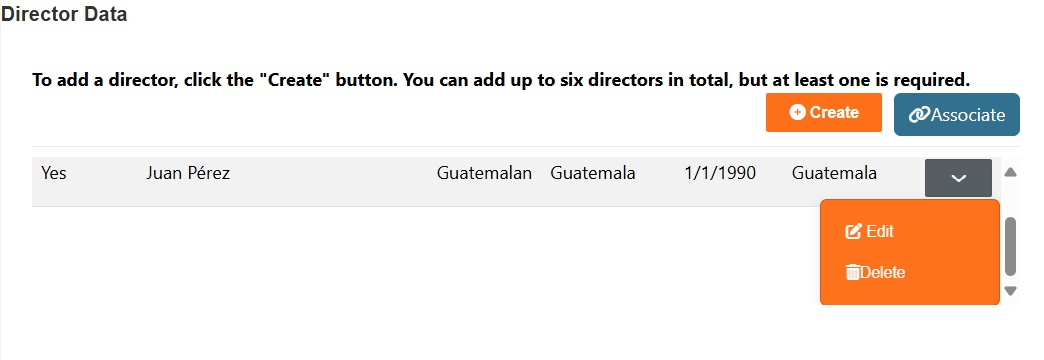
Sections for: "Director data", "Shareholders", "Authorized contacts for signing commercial documents", and fields for "Legal representative" and "Final beneficiary"
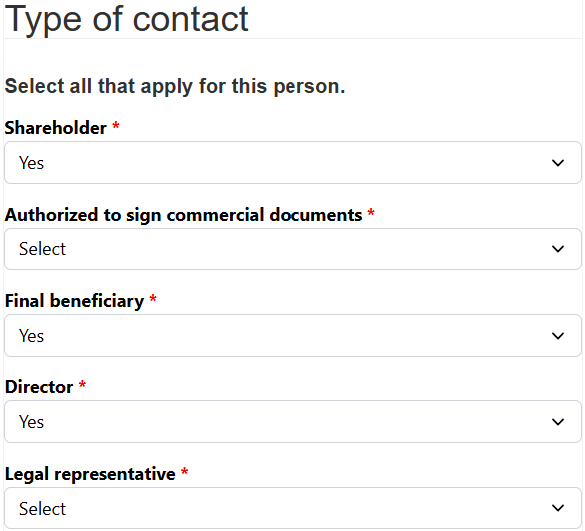
- These sections require the specific information stated in the section title. However, when entering the data, you can select multiple roles, including Director, Shareholder, Legal Representative, Final Beneficiary, and Authorized Contacts for Signing Commercial Documents.
- If a person holds multiple roles, they must select all that apply when entering their data, regardless of the section they are filling out.
Example:
If a Director is also a Shareholder and a Beneficial Owner, they can enter the information once and select all those roles when creating the record.
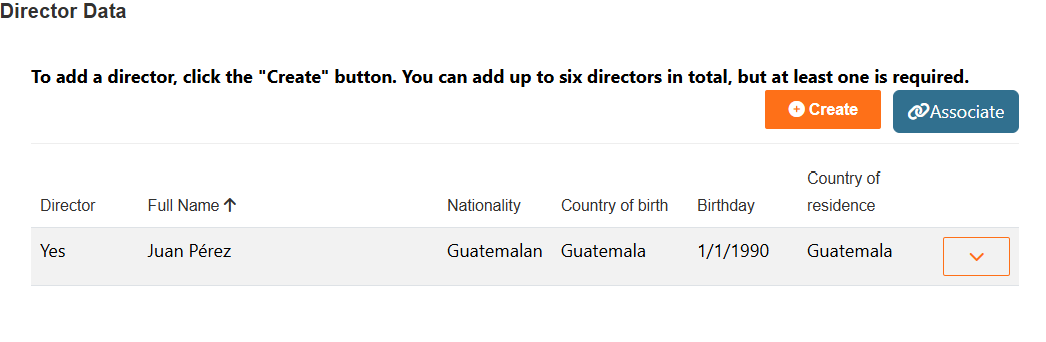
- In the Director Data section, click "Create".
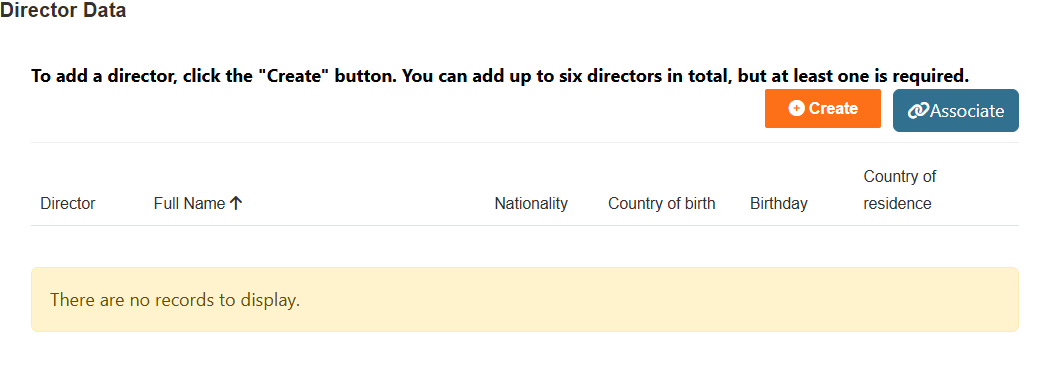
- Select "Yes" for “Director”, “Shareholder”, and “Final Beneficiary”, complete the required information and click "Submit".
- The system will automatically fill in the same information in the Directors and Shareholders sections, so you don't have to enter it again.
- In the Final Beneficiary field, click the magnifying glass button and select the previously created record.
- After submitting the data, click the orange arrow to edit or delete the person if a mistake was made.
Signing the form
- Scroll to the bottom of the page and select "Yes" for "Proceed to sign the document?".
- Click "Save".
- If any required fields are left blank, the system will redirect you to the top of the form and display links to incomplete fields.
- Click the link to be taken to the field and complete it. Ensure "Yes" is still selected for "Proceed to sign the document?", then click "Save" again.
Receiving the form for signature
- The Legal Representative will receive and email from DocuSign with the form for review and signature.
- If errors are found or changes are needed, return to edit the form, correct the data, and reselect "Yes" for "Proceed to sign the document?".
- A new email with the updated version will be sent for signing.